


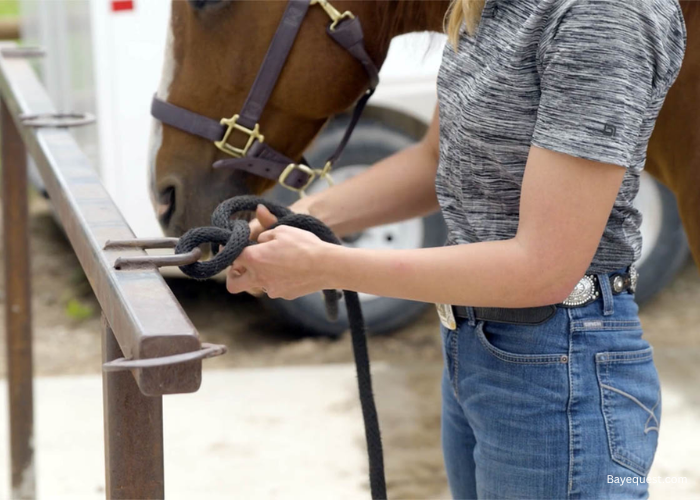
A horse that panics while tied can put enormous force on its head and neck, turning a simple tie-up into a serious injury risk. That is why learning a horse quick release knot matters.
The halter hitch is one of the easiest options: it holds securely but can release with one pull when needed.
In this guide, you will learn how to choose the right gear, prepare a safe tie point, tie the knot correctly, and avoid common mistakes.
Horse Quick Release Knot: Key Takeaway
A horse quick release knot can make tying safer, but it’s only part of the system. Use a suitable halter, a secure anchor, the right rope length, and a reliable breakaway point. Most importantly, practice the halter hitch until you can tie and release it quickly under pressure.
Horse Quick Release Knot: The Easiest Way to Tie One, Step by Step
Tying a horse safely starts long before you make the knot. The gear, anchor point, rope length, and setup all determine how well the quick release will work in an emergency.
Follow these steps in order to create a secure tie that can still be released quickly when it matters.
Step 1: Get the Right Halter and Lead Rope
The two items most beginners own, a rope halter and a nylon lead rope, are the two things experts tell you never to tie with.
What sits on the horse’s head decides everything. A perfect knot cannot rescue bad gear.
Use a flat halter, leather or nylon, ideally with a breakaway crownpiece (the strap over the top of the head, behind the ears). Young Rider is blunt about rope halters: one will dig in painfully if he panics and pulls back.
Here is the mechanism nobody else gives. A rope halter’s cord is far thinner than a flat strap, and the thinner the rope is, the less force is required to create more pressure.
All that force funnels onto the poll, the bony point just behind the ears. Same area as the injuries above.
Rope halters carry a second problem: no breakaway, so a tied horse cannot free itself.
Your lead rope: cotton or hemp beats nylon, for two checkable reasons. Nylon under load gives your hands a bad rope burn, and it cannot be spliced, so it meets the snap through a metal clamp that can bend and rust.
Cotton has one quirk worth knowing. Cotton rope halters shrink when wet, so check the fit on one that has been rained on.
Missouri Extension puts the working thickness at 3/4 inch or more, because thinner leads break under real tension.
Never tie by the reins or bit. A bridled horse that panics breaks the reins and can tear up its mouth, because that bit in his mouth is basically a knife at that point.
If you only change one thing, change the halter, because its risk lands on the horse’s nervous system. Hang a cheap flat breakaway halter at the tie spot and leave the rope halter for leading and groundwork. The rule is about tying, not handling.
Step 2: Pick an Anchor Point That Cannot Move, Break, or Swing
Three respected sources give three different answers to one question: how much lead rope should you leave? None explains why, so we sorted it out.
Start with the anchor. Your knot is only as strong as what holds it.
Tie to a post, never a rail. Cowboy Way gives the reason everyone else skips: pull a rail free and the horse ends up running loose with a board swinging at him as he runs.
The horse is now fleeing something still attached to it.
The same logic rules out gates, which swing and unlatch, plus stall bars, trailer fenders, and vehicles. A good anchor is a post set deep in the ground, ideally concreted, or a ring bolted through a wall.
Now height. Tie at the withers (the bony ridge where the neck meets the back) or higher.
Three of the five guides we checked agree. The reason is leverage: a high tie point gives the horse a poor pulling angle and stops a leg getting over the rope, which is how a scare becomes a flip.
Then length, where sources fall apart. Young Rider says about 18 inches from knot to snap, Animated Knots says two to three feet, with ponies shorter, and UGA only asks that the horse hold its head at a normal level.
Nobody reconciles those numbers, so here is our call.
Treat 2 to 3 feet as the general rule, because that figure recurs in trailer and hitching guidance. Go shorter, toward 18 inches, in confined spaces like a narrow trailer stall, where slack only lets the horse build speed into a wall. That last part is our reading, not a rule any single source states.
Run four checks before you tie. The horse stands square, head at rest. It cannot reach the ground or get a leg over.
The rope slopes gently to the halter with no low loop to catch a hoof. The post does not shift when you throw your weight at it.
Step 3: Build a Safety String That Actually Breaks
Every guide on this topic tells you to tie to baling twine so it snaps in an emergency. Owners keep finding out it does not snap.
The idea is sound. Put a deliberate weak link between the post and the rope, so the string fails before the halter, the horse, or the barn does.
The execution is where it falls apart. UK owners report some of the twines have a 5 tonne breaking strain, which is far stronger than any halter you will buy.
The failures are not theoretical. One horse pulled the wooden slats off her stable. Another pulled stones out of a barn wall. In the worst account, the twine held and the horse took the door frame with it.
In each case the twine won and the building lost.
Not all twine is equal. The dangerous kind is large round or square bale twine, often nylon now, thick and slick. The usable kind is older small-bale sisal, thinner and rougher.
So build the string properly. Use one thin strand, never doubled, and never the heavy stuff.
Loop it through the ring or around the post and tie it to itself, leaving a loop of about four inches to tie into.
Then test it. Pull the loop hard by hand before a horse ever meets it, and replace it if you cannot break it with a determined tug.
If it survives you, it will survive the horse, which means the horse is now tied to the building itself.
Sun and weather rot twine, so replace it every few months. The knot in Step 4 ties into this loop, never directly to the post.
Step 4: Tie the Quick Release Knot in Six Moves
Six moves, under a minute once it is in your hands. Learn five words first.
The standing part is the horse’s end, running from halter to post. The working end, or tail, is the free end in your hand. A bight is a doubled-over fold of rope, a U shape, never the rope’s end. In front means the face of the rope nearest your body, and behind means the far face, the one against the post.
We follow Animated Knots, backed by UGA Extension. Where another site says “over and under”, we mean “in front, then behind”. Same motion.
Stand facing the post with the horse on your left, so the rope runs from the halter, past your left hip, to the safety string loop. Left and right are yours as you face the post.
- Pass the working end through the safety string loop so the tail comes out on your right and the standing part runs left, toward the horse. Hold it in your left hand a foot below the loop, under light tension. That hand stays put.
- With your right hand, carry the working end right to left across the front of the standing part, between it and your body. The strands now cross, working end in front, standing part behind.
- Carry it on round behind both strands at that crossing, against the post, then back out to the front on your right. That circle of rope around the standing part is the rope-loop.
- Fold a bight in the working end. Pinch eight to ten inches back from the tail and double it into a U, loose end still in your right hand. The end itself goes through nothing.
- Push the bight through the rope-loop from the front, so the fold comes out behind and the tail stays in front, on your right, away from the horse.
- Snug it. Hold the standing part firm in your left hand and pull the bight down and away with your right until the knot draws tight against the string loop.
Do not crank it. Knotspedia warns that over-tightening defeats the purpose. Leave a long tail you can grab.
To release, pull the free tail. The whole hitch collapses in one motion.
Left-handers mirror all six moves. Fine, as long as the tail finishes away from the horse.
You will know it is right when the tail hangs on your right, out of the horse’s reach, the knot sits snug against the string loop, and one pull drops it open.
If pulling the tail tightens anything, you tied it wrong. Step 6 tells you which wrong.
Step 5: Decide Whether to Tuck the Tail (The Tradeoff Nobody Mentions)
Three of the five guides we checked tell you to tuck the tail. Exactly one of the three tells you what tucking costs.
The tuck is one extra move: pass the tail end through the bight of the finished knot from Step 4.
Horses learn to untie themselves by grabbing the tail with their teeth, and a tucked knot resists that. Young Rider and Animated Knots both recommend it, and neither mentions the tradeoff.
Wikipedia alone says it out loud: the tuck stops accidental loosening and clever animal behaviour while keeping release easy, though not instantaneous.
Read that carefully. Not instantaneous.
A tucked knot needs two motions in an emergency. Pull the tail free of the bight, then pull the bight. In a real panic you will fumble the first one.
So here is our rule. Tuck when you are walking away or leaving the horse for more than a moment, and when the horse is a known fiddler.
Leave it untucked when you are standing right there, when the horse is new to tying, or any time you are grooming, tacking, or clipping within arm’s reach.
Untucked defaults to fastest release. Tucked defaults to hardest to defeat.
Match it to who is nearby, not to habit.
Step 6: Test the Knot Before You Walk Away
A ten-second test tells you whether you tied a quick release knot or a jamming noose. Run it on a fence rail now, not later with a horse attached.
Two mistakes catch beginners, and no competing page names either.
The first is the mirror-image loop. Form the rope-loop the wrong way round and the knot tightens under load instead of slipping, which is exactly the knot we are avoiding.
The tell: the tail comes out on the horse’s side, or pulling it tightens the knot.
The second is pushing the end instead of the bight. Feed the loose working end through the rope-loop and you tie a plain overhand knot around the standing part.
It looks almost identical and will not release at all. The tell: nothing sticks out to pull on, just a single strand.
Now the test. Lean your body weight into the standing part to load the knot the way a horse would, and check it holds.
Take the load off. Pull the tail once.
A correctly tied halter hitch resists considerable load while staying easy to adjust and quick to release. It should fall open in one motion, not bind.
If the test fails, untie it completely and tie it again from Step 4. Never nudge a half-wrong knot into shape, because you will not know which version you got.
Go to a live horse only once you can tie and release three times in a row on a rail without reading this.
Step 7: Know What to Do When the Knot Jams
The quick release knot is not guaranteed to release. Nobody teaching it wants to say that, so we will.
Young Rider names the failure: if a horse pulls rapidly and hard enough on the tied end, the loop doesn’t have time to come through and the knot tightens just like a regular knot. What is left is a lead rope with a permanent knot.
Rope material stacks the odds: slippery synthetics and nylon grip less predictably than cotton or hemp. That is the second reason Step 1 mattered.
So carry a knife, a pocket knife or a rope knife, every time you handle or haul horses.
A blade touched to a rope already under tension cuts almost immediately, with no sawing motion. The horse’s pull does the work.
Practice drawing and opening it until it needs no thought. You will not be thinking clearly when it counts.
Cut the standing part between knot and horse, where the rope is tightest and your hands sit furthest from the knot. Stay outside the striking range of the front legs, and expect a fighting horse to move in any direction.
If you cannot reach safely, do not. Cut the safety string instead if it is closer.
Afterwards, have the horse checked even if it looks fine. Porenta’s bursa damage can surface months later.
The wrong instinct is to grab the tail and haul while the horse fights. That loads the knot harder and puts your hands in the danger zone.
Cut instead, from outside.
Step 8: Teach the Horse to Tie Before You Ever Leave It Tied
A horse that has never learned to give to pressure will hit the end of that rope at full speed the first time a plastic bag blows past. No knot changes that first second.
The knot handles the emergency. Training prevents it.
Jake Nodar, a certified trainer who specialises in young and problem horses, builds tying tolerance in three stages. The horse is not actually tied until stage three.
First, teach yield to pressure. Put light pressure on the lead rope and reward any step the horse takes toward that pressure, never away from it.
That one habit is the whole foundation. A horse that answers pressure by stepping forward never reaches the end of a rope.
Second, simulate it. Loop the rope around a post at head height but hold the slack in your hand, so the horse feels the geometry of tying while you can release instantly.
Add distractions slowly.
Third, tie briefly and stay put. Use the quick release knot for short supervised sessions, staying within arm’s reach.
Nodar also puts numbers on it: at least six months old before tying, and closer to two years before cross-tying.
Leave a horse tied unattended only after it holds still through the simulated stage with distractions running, and answers pressure by stepping forward rather than bracing.
Step 9: When a Knot Is Not the Easiest Answer
Some respected trainers think almost no horse should ever be tied hard. Ross Jacobs of Good Horsemanship puts it plainly: every horse should learn to tie up brilliantly, but very few horses should ever be tied.
His alternative is mechanical, not philosophical. Wrap the lead two or three times around the post instead of knotting it, so it slides under load.
The reasoning is the useful part. A fixed knot gives an instant hard stop at full force, while a sliding rope lets the horse feel escape is possible, so it often stops pulling before the rope runs out.
He goes further, arguing tie rails break and spinal injuries follow. That conflicts with most of what you just read, and he is still worth hearing.
Then there is hardware, which removes the knot entirely.
So what is genuinely easiest? For a confident handler standing right there, the knot wins. It is free, needs no gear, and works anywhere.
For a nervous beginner with a horse that worries, a tie ring or breakaway halter is honestly easier and safer. It removes the variable that fails hardest under stress: a frightened human tying a knot.
Learn the knot regardless. There will be a day with no hardware in sight. Then buy the tie ring.
FAQ
Does tucking the tail end through the bight defeat the quick release?
No, but it is a real tradeoff, not a free upgrade. A tucked knot still opens, just in two motions instead of one. Wikipedia is the only major source to say the tuck keeps release “easy (though not instantaneous)”. Young Rider and Animated Knots both recommend it without naming that cost. See Step 5.
Why does one source say 18 inches of lead and another says 2 to 3 feet?
Use 2 to 3 feet as your general rule, and go shorter in confined spaces like a trailer stall. Ponies get shorter again. No source reconciles the two figures, so that split is our reading rather than a published rule. The 2 to 3 foot number recurs across trailer and hitching guidance, which is why we default to it.
Can I tie a horse in a rope halter or with a nylon lead rope?
Avoid the rope halter for tying; the nylon lead is the lesser problem. Thin rope concentrates pressure on the poll and offers no breakaway, so a panicking horse cannot free itself. Nylon’s downsides are rope burn to your hands and a metal clamp that can rust. Swap the halter first. Rope halters stay fine for leading.
What do I do if my horse pulls back and the knot will not release?
Cut it. Keep a knife on you whenever you handle horses, because a blade touched to a taut rope cuts without sawing, and the horse’s own pull does the work. Cut the standing part between knot and horse, staying outside the striking range of the front legs. Practise drawing the knife until it needs no thought.
Is baling twine actually a safe weak link?
Not reliably. Some twine is rated to multi-tonne breaking strains, and owners describe horses pulling stable slats, wall stones and a door frame loose while the twine held. Large-bale and nylon twine is the worst offender. Use a single thin strand of older small-bale twine, and break a sample loop by hand before you trust it.
Is it safe to tie a horse to a fence?
To a post, never to a rail. A post set firmly in the ground, ideally concreted, is a sound anchor. A rail pulls free and becomes a swinging projectile still attached to the fleeing horse. Gates and stall bars are out for the same reason, and so are vehicles and trailer fenders, because anything that moves can be dragged.
Can I tie a horse by its bridle or reins if there is no halter handy?
No, never. A bridled horse that pulls back breaks the reins and can tear up its mouth on the bit, which acts like a blade under that much force. Use a halter and lead rope every time, even if that means buckling one on over the bridle. No hurry justifies the risk.
Is the halter hitch the same as a highwayman’s hitch or a manger tie?
No, and mixing them up matters. The halter hitch is a slipped noose knot, structurally the same as the Falconer’s Hitch. The Highwayman’s Hitch is a different three-bight hitch whose locking bight can collapse under tension. The manger tie, the Siberian hitch, and the slipped half hitch are separate knots again. Search “halter hitch” and nothing else.
Horse Quick Release Knot: Conclusion
Tying a horse safely is about more than knowing the right knot. A quick release knot works best when paired with the right halter, lead rope, secure anchor, and reliable breakaway point.
Practice the halter hitch until you can tie, test, and release it without hesitation. Most importantly, never rely on the knot alone.
Good equipment, proper training, and careful supervision are what truly reduce the risk when a horse panics or pulls back.