

Welcome to the art of saddle care. Picture this: a shiny, well-maintained saddle that not only looks great but also ensures a comfortable ride.
Cleaning your saddle is more than just a chore. It’s a ritual that enhances your connection with your horse. Whether you’re a seasoned equestrian or just starting out, mastering the art of saddle cleaning is a must.
It’s not just about aesthetics; it’s about preserving the life of your saddle and ensuring the best performance. So, grab your cleaning supplies and embark on a journey to transform your saddle from dull to dazzling.
Ready to give your saddle the TLC it deserves? Let’s get started.
How to Clean a Saddle
- Prepare the saddle
- Remove dirt and debris
- Tackle the hard o reach areas
- Wash the saddle using warm water and soap
- Remove the excess soap residue
- Dry the saddle
- Apply leather conditioner
- Buff and polish the saddle
- Clean the metal fittings
- Reassemble the saddle
How to Clean a Horse Saddle: Step-by-Step Guide
A well-maintained saddle looks stunning and ensures a comfortable ride for you and your horse. So, let’s dive in and give your saddle the love and care it deserves.
Items you’ll need
- Saddle soap
- Leather conditioner or conditioning oil
- Soft cloths or sponges
- A bucket of water
- A soft brush
- Metal cleaners
- Toothbrush
- Buffing cloth
- Drying cloth/ a small towel
Step-by-step guide
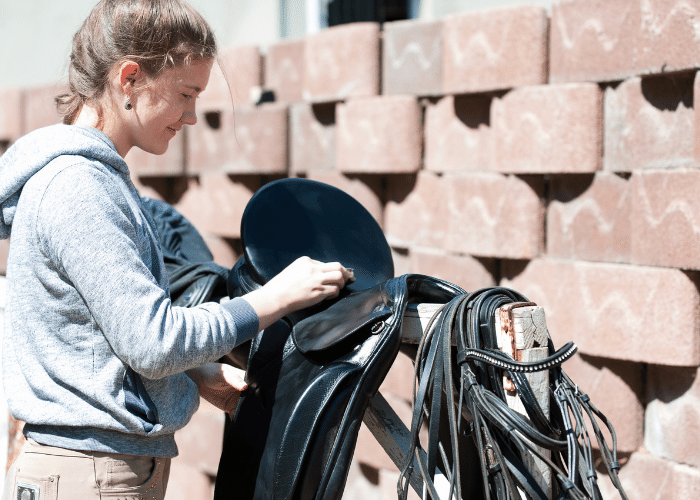
Step 1: Prepare the saddle
Preparing the saddle is crucial for a thorough cleaning. Begin by placing your saddle on a sturdy stand or a clean, flat surface. This will give you easy access to all parts of the saddle.
Next, remove any detachable parts, such as stirrups or girth straps, to ensure you can clean every nook and cranny. This initial preparation sets the stage for a deeper clean and helps protect the leather from damage during the cleaning process.
Step 2: Remove dirt and debris
Here, you’ll focus on removing dirt and debris from your saddle.
Start by using a soft-bristled brush to gently sweep away any loose dirt, dust, or hair from the surface of the saddle. Avoid scratching the leather.
Pay special attention to crevices and seams where dirt tends to accumulate, as these areas can often be overlooked.
Step 3: Tackle the hard-to-reach areas
You may need to use a soft toothbrush or a specialized leather cleaning tool for tougher spots or areas with caked-on dirt. Gently scrub these areas in a circular motion to loosen the dirt without damaging the leather.
Once you’ve removed the dirt and debris, you’re ready to move on to the next step in the cleaning process.
Step 4: Wash the saddle using warm water and soap
Now that the surface dirt and debris have been removed, it’s time to give your saddle a more thorough wash.
Mix a small amount of saddle soap with warm water in a bucket. Saddle soap is specially formulated to clean leather without causing damage.
Dip a soft sponge or cloth into the soapy water and wring out any excess liquid. The cloth should be damp, not dripping wet.
Gently wipe the saddle with the soapy cloth, working in small sections. Be sure to clean all parts of the saddle, including the undersides and crevices.
You may need to rinse and wring out your cloth frequently to avoid reapplying dirt to the saddle as you clean. If you encounter any stubborn stains or buildup, gently rub the area with a soft brush or a cloth wrapped around your finger.
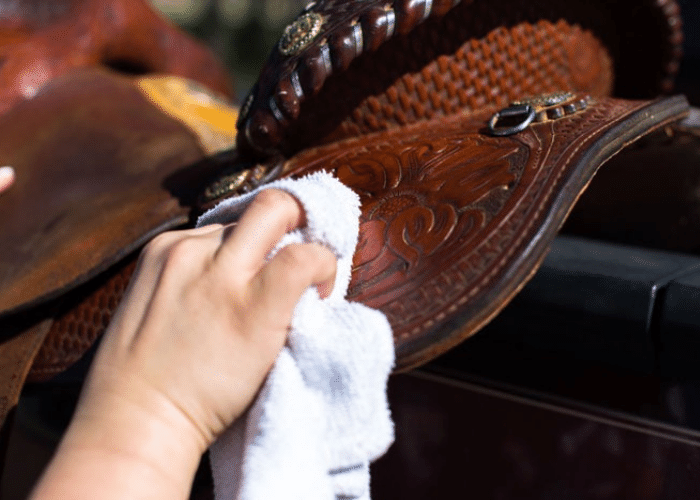
Step 5: Remove excess soap residue
After washing the saddle, remove any excess soap residue to prevent the leather from drying out or becoming sticky.
Begin by gently wiping down the entire saddle with a clean, damp cloth. This will help lift any remaining soap particles from the leather’s surface.
As you wipe, rinse the cloth in clean water to avoid reapplying soap to the saddle. Pay special attention to crevices, seams, and other areas where soap residue might accumulate.
Step 6: Dry the saddle
After removing excess soap residue, avoid leaving the saddle in direct sunlight or near a heat source, as this can cause the leather to crack or warp. Instead, allow the saddle to air dry naturally in a well-ventilated area.
Use a clean, dry cloth to gently pat the surface of the saddle, soaking up any remaining moisture. Be sure to check all areas, including under flaps and in crevices, where water might collect.
If possible, leave the saddle on a saddle stand to ensure air can circulate around it, speeding up the drying process.
Allow the saddle to dry completely before proceeding to the next step or using it again. Depending on your environment’s humidity and temperature, this may take several hours or even overnight.
Step 7: Apply leather conditioner
Once your saddle is completely dry, it’s time to nourish and protect the leather by applying a leather conditioner. This step helps keep the leather supple and prevents it from drying out or cracking over time.
Choose a high-quality leather conditioner suitable for equestrian equipment. Apply a small amount to a soft, clean cloth or sponge. Gently rub the conditioner into the leather in a circular motion, making sure to cover the entire surface of the saddle.
Pay particular attention to areas that experience more wear and tear, such as the seat and stirrup leathers.
Allow the conditioner to penetrate the leather for a few minutes, then use a clean, dry cloth to buff away any excess product. This will leave the saddle with a soft, natural shine and ensure that the conditioner is evenly distributed.
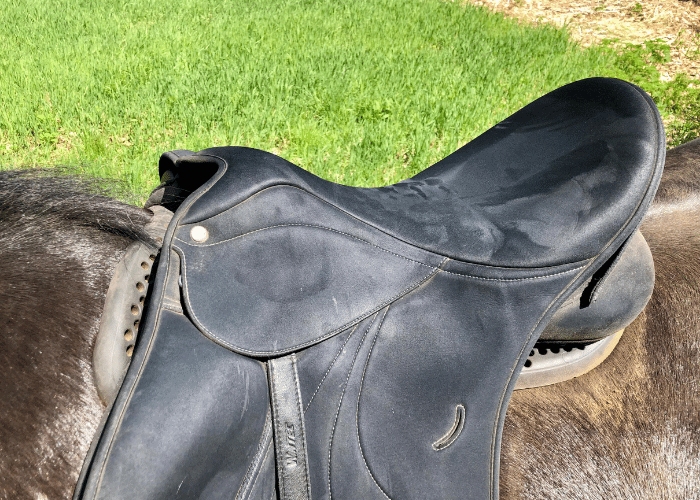
Step 8: Buff and polish the saddle
Now, give your saddle a beautiful shine and a professional finish.
After the leather conditioner has been absorbed, take a soft, clean cloth or a horsehair brush and gently buff the surface of the saddle. Use circular motions and a light touch to bring out the natural luster of the leather.
As you buff, focus on achieving an even, smooth finish. The buffing process enhances the saddle’s appearance and helps further work the conditioner into the leather.
Once you’ve finished buffing, step back and admire your work. Your saddle should now look clean, refreshed, and ready for your next ride.
Step 9: Clean the metal fittings
The final touch to a thoroughly cleaned saddle is to polish the metal fittings. These include the buckles, stirrup bars and D rings. Over time, these fittings can accumulate grime and tarnish, detracting from the saddle’s overall appearance.
Start by using a soft cloth or a small brush to remove any dirt or debris from the metal parts. Be gentle to avoid scratching the surface.
Once the fittings are free of dirt, apply a small amount of metal polish to a clean, soft cloth. Rub the polish onto the metal fittings in a circular motion, ensuring that you cover all areas.
After applying the polish, buff the fittings until they shine with a clean, dry cloth. This will remove any excess polish and bring out the metal’s natural brilliance.
Step 10: Reassemble the saddle
After cleaning and polishing every part of your saddle, it’s time to put it all back together. Start by reattaching any parts that were removed during the cleaning process. Make sure that each component is securely fastened and properly positioned.
As you reassemble the saddle, check the condition of all straps, buckles, and attachments. Ensure that there are no signs of wear or damage that could compromise the safety or functionality of the saddle. If any repairs are needed, address them before using the saddle again.
Once everything is reattached, give your saddle one final inspection to make sure that it’s ready for use. The leather should be clean, conditioned, and dry, with all metal fittings shining and secure.
With your saddle now in pristine condition, you can look forward to a comfortable and stylish ride.
Interesting read: Hermes Saddle Price.
How to Clean a Synthetic Saddle
Cleaning a synthetic saddle is a bit different from cleaning a leather saddle. Here’s a step-by-step guide to help you clean your synthetic saddle:
1. Remove accessories. Start by removing any detachable parts such as stirrups, girths, and saddle pads. This will make it easier to clean every part of the saddle.
2. Dust off. Use a soft brush or cloth to remove loose dirt or debris from the saddle’s surface. Pay special attention to crevices and seams where dirt can accumulate.
3. Wipe down. Take a damp cloth and wipe down the entire saddle. For synthetic saddles, you can use a mild soap or a specialized synthetic saddle cleaner. Avoid using harsh chemicals or abrasive cleaners that could damage the material.
4. Scrub tough spots. If there are any stubborn stains or marks, use a soft brush or sponge to gently scrub the area. Be careful not to scrub too hard, as this could damage the synthetic material.
5. Rinse. Use a clean, damp cloth to wipe off any soap residue. Make sure to remove all the soap to prevent any sticky or slippery spots on the saddle.
6. Dry. Allow the saddle to air dry completely before reattaching any accessories. Avoid drying it in direct sunlight or using a heat source, as this could warp or damage the synthetic material.
7. Condition. Apply a UV protectant spray to help prevent fading and cracking from sun exposure.
8. Reassemble. Once the saddle is dry, reattach the stirrups, girth, and any other accessories. Make sure everything is securely fastened before using the saddle again.
Read also: How to Wash Horse Blankets.
Extra Tips on Saddle Cleaning
Here are some extra tips to keep in mind when cleaning your saddle:
Regular maintenance. Clean your saddle regularly, even if it doesn’t appear dirty. This will help prevent dirt and sweat from building up and damaging the leather over time.
Spot cleaning. For small spots or stains, spot-clean the area as soon as possible. This can prevent stains from setting in.
Avoid over-cleaning. While it’s important to keep your saddle clean, over-cleaning can strip the leather of its natural oils, leading to dryness and cracking.
Test products. Before using any new cleaning or conditioning product on your entire saddle, test it on a small, inconspicuous area to ensure it doesn’t cause discoloration or damage.
Use the right tools. Always use soft cloths, sponges, and brushes to avoid scratching the leather. Avoid using harsh chemicals or abrasive materials.
Remember the underside. Clean and condition the underside of the saddle, as this area can accumulate sweat and grime from the horse’s back.
Storage. Store your saddle in a cool, dry place away from direct sunlight and heat sources to prevent drying and fading. Use a saddle cover to protect it from dust and moisture.
Professional care. If your saddle has suffered damage, consider seeking professional cleaning and repair services.
Read also: How Much Do Western Saddles Weigh?
How to Properly Store Your Saddle
Properly storing your saddle is crucial for maintaining its condition and extending its lifespan. Here’s how to store your saddle correctly:
Choose the right environment. Store your saddle in a cool, dry place. Extreme temperatures and high humidity can damage both leather and synthetic materials. Avoid places like damp basements or hot attics. A temperature-controlled room is ideal.
Use a saddle stand or rack. Always place your saddle on a saddle stand or rack that supports the entire underside evenly. This helps maintain the saddle’s shape and prevents it from warping or bending. Make sure the rack is sturdy and positioned away from direct sunlight or heat sources.
Clean before storing. Before storing your saddle, give it a thorough clean. Remove dirt, sweat, and grime, as these can cause the material to break down over time. For leather saddles, apply a conditioner to keep the leather supple.
Cover the saddle. Use a breathable cover to protect your saddle from dust and scratches while in storage. Avoid plastic covers, which can trap moisture and lead to mold growth. A cotton saddle cover is a good choice as it allows air circulation while protecting the saddle.
Check regularly. Even in storage, check your saddle for signs of mold, pests, or deterioration. This is also an opportunity to air it out and prevent musty odors from building up.
Avoid hanging by the stirrups. Some people hang saddles by the stirrups for convenience, but this can distort the shape of the stirrup bars and stress the leather. Always use a saddle stand or rack.
How to Know When to Replace a Saddle
Knowing when to replace your saddle is important for your comfort and safety. Here are key signs and considerations that indicate it might be time for a new saddle:
Visible damage. Check your saddle for visible signs of wear and tear. These include deep cracks in the leather, torn stitching, broken trees, or worn-out padding. These issues can compromise the saddle’s structural integrity and safety.
Discomfort. If you or your horse starts experiencing discomfort during rides that weren’t there before, it could be due to changes in the saddle’s fit.
Poor fit. As horses age, their body shapes can change. Similarly, the old saddle might not fit well if you’re riding a new horse. A poorly fitting saddle can cause pressure points, leading to discomfort and even injury for your horse. If adjustments or padding don’t improve the fit, it may be time to look for a new saddle.
Expert opinion. Have a professional saddle fitter inspect your saddle regularly. They can provide an expert opinion on the condition of your saddle and whether it can be repaired or should be replaced. This is especially crucial if you use your saddle frequently or for competitive riding.
Changes in discipline. If you change your riding discipline, your current saddle may no longer be appropriate. Different styles of riding require different types of saddles to ensure proper position, balance, and effectiveness.
Outdated technology or features. Saddle technology and design have improved significantly over the years. Newer models may offer improved comfort and features if your saddle is old.
How Do You Get Mold Out of a Saddle?
To remove mould from a saddle, first, take it to a well-ventilated area and wear protective gloves and a mask. Start by brushing off any surface mold using a soft brush to avoid scratching the leather.
Mix one part of water and vinegar to create a solution that kills mold spores without damaging the leather. Apply the solution with a soft cloth, gently wiping the affected areas.
Avoid saturating the leather to prevent additional moisture damage. Once cleaned, allow the saddle to air dry completely in a dry, airy environment.
After drying, apply a leather conditioner to restore moisture and protect the leather from future mold growth.
Read also: How to Measure Horses for Western Saddles.
FAQS
How often should I clean my saddle?
Depending on the frequency of use, you need to clean your saddle regularly. A basic wipe-down after each use and a thorough cleaning once a month is advisable for active riders. For less frequent use, cleaning every three to six months is sufficient.
What happens if I don’t clean my saddle?
Neglecting to clean your saddle can lead to the accumulation of dirt, sweat, and oils, which can break down the leather over time, leading to cracks, stiffness, and discomfort for both the rider and the horse. Additionally, mold and mildew may develop, further damaging the saddle.
Can you put saddle pads in the dryer?
Do not put saddle pads in the dryer, as high heat can shrink or damage certain materials. Instead, air drying is preferable. If you must use a dryer, use the lowest heat setting and remove the pad while it is still slightly damp to avoid over-drying. Always check the care label for specific instructions.
Conclusion
That wraps up our saddle care journey. Remember, a clean saddle isn’t just about looking good. It’s about the comfort and safety of both you and your horse.
Regular cleaning keeps your saddle in top shape, extending its life and ensuring many smooth rides ahead. So, next time you gear up, give your saddle the love it deserves.
It’s not just maintenance; it’s a bond between you and your horse. Here’s to enjoying many more happy trails with a saddle that’s as ready for adventure as you are!