

Isn’t it dandy to be riding a horse that you can open gates with? Not to mention being able to move him over to get your Coke off the fence, untie a horse you’re ponying, or smooch your honey on another horse. And, in fact, good leg control of a horse makes him much safer to ride. He can be aimed away from overhanging branches, kept away from the edge on narrow trails and drop-offs, and kept straight on steep hills with a minimum of geeing and hawing on the reins.
Some horses come into our lives knowing these things, some we are able to maul around and get to do a passable job of opening gates; if they open the right way, if there are no complications, if he feels like it, and with lots of precarious leaning and reaching. Many training methods have been suggested. Perhaps the least likely is one overheard recently. To get a horse to side pass over a pole, you get somebody on the ground to push him over! Maybe this could work, but it sounds awfully awkward.
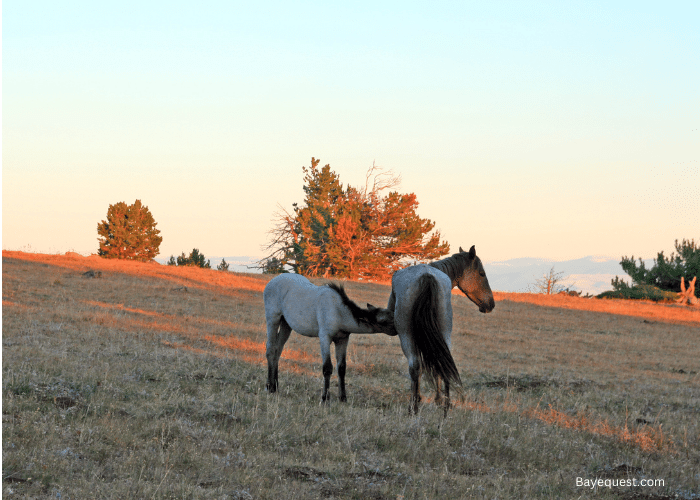
With lots of our high-powered horses, especially young and green ones, getting them to relax and stand still can be a problem. When a training method pressures and scares the horse, the problem is compounded. We need them to stand well to open and close gates. Pulling on the horse’s mouth and kicking him, which is so often resorted to, is not effective. It has also led to rearing, out-of-control backing up, head tossing, tail wringing, and sometimes refusal to approach a gate at all.
So, how to avoid all this and get a horse to obey leg signals, work gates, etc., and like it? Like all other training projects, it’s a step-by-step process. Think of building a house. The roof can’t go up until the walls are up, the walls can’t go up until the foundation is built. The horse will be stressed and the results will be haphazard if steps in the process are deleted or rushed.
PREPARATION
Is the horse comfortable? He should be well enough started to know basic cues; to move forward from leg cues, to back up passably, and to be relaxed with the rider. Colts ridden just a few times can be started on gates if they are comfortable with the basics. Older horses will do fine, too.
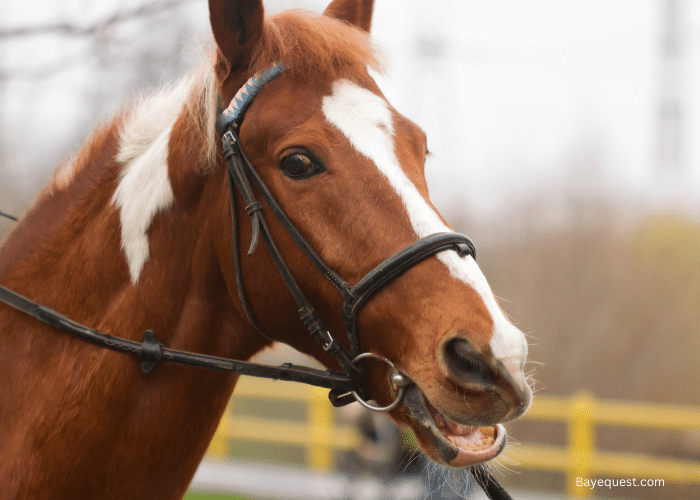
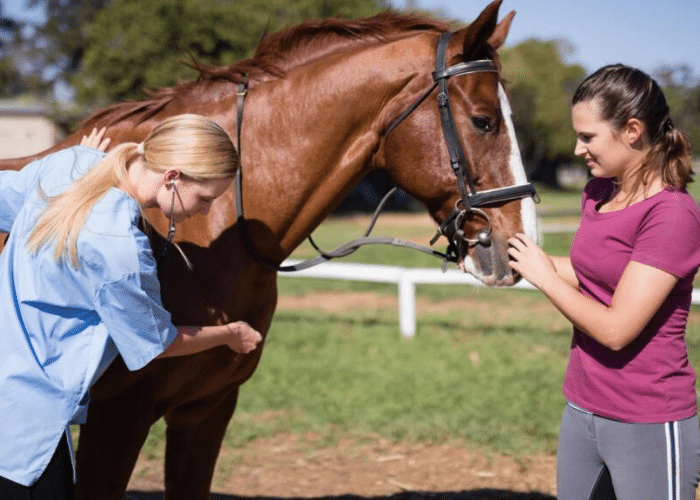
How about his back and mouth? Does the saddle fit well without being cinched too tight? Is his mouth free of damage? Always check a new horse’s mouth for wolf teeth; tiny teeth embedded in the gums just in front of the upper molars. They interfere badly with a bit and cause lots of mouth problems that the horse usually gets blamed for. They can be pulled in three minutes by your veterinarian. While you’re checking for wolf teeth, feel the outside edges of the upper molars. If these are sharp, the bit pulls the lips into them and causes pain. These edges should be removed by floating. Too often we’ve heard, “But he just had his teeth floated!” only to find wolf teeth and sharp places in the horse’s mouth. Please check.
A plain snaffle is the bit of choice for these exercises. It should fit well; not sloppy and wide or too narrow. The diameter should be appropriate. A sensitive-mouthed horse often does best in a thicker mouthpiece. Having the mouth kept shut with a bosal or noseband, or not, seems to be a matter of personal preference. We prefer not to force the horse’s mouth shut. If his mouth stays soft, relaxed and closed without being forced, then you are using your hands correctly.
Many smaller horses need a 4 1/2″ or 4 3/4″ wide mouthpiece. If the bit is too wide, when pressure is put on both reins, the joint protrudes forward into the roof of the horse’s mouth, causing discomfort. It will also hang too low and bump the bridle teeth on a gelding or stallion. Snaffles with a significant curve to the mouthpiece, allowing less pressure on the tongue seems to work well, as do snaffles with two joints. Any shanked bit, including a shanked snaffle or mechanical hackamore, will not work for this. What we are teaching is lateral control, and these bits are not designed for it. Put on a plain snaffle, pull a rein to the side, and look at the way the bit works. Try the same thing with a shanked bit. The pull is too low in relation to the mouth, causing the bit to twist. Finally, please no tie-downs, etc. With no gimmicks, the horse must learn the correct response to the bit and the end result will be much better.
With the horse’s mouth and back happy, and fitted with all the right gear, go for your usual ride. These exercises work better at the end of a ride when the edge is off. When you accomplish what was intended for the day’s “gate lesson”, dismount, loosen your cinch and leave the horse tied for a while to let the lesson soak in. If he really did well, give him a handful of grain and put him away. Rewards do a lot of good when appropriate to the horse.
STEP ONE – GIVING TO THE BIT LATERALLY
The goal here is for the horse to bend his head clear around to your leg in response to the rein when asked. Start by putting light pressure on one rein, holding, and releasing the pressure the instant the horse responds. At first, be content with a small response, and gradually ask for more. Do both sides equally. In two or three sessions he should bend easily to both sides. If he wants to walk around, sit deep and relaxed in the saddle and just wait. The instant he yields and stops, release the pressure. Don’t pull on him! If the horse won’t respond to light pressure, use more pressure at first, then get lighter as the horse gets the idea. If you’re really having a problem, put the horse in a stall or other safe place and tie a rein to the stirrup or girth straps, just tight enough so that when the horse brings his face around, the pressure will release. Leave him a couple of minutes on each side. Then get back on him and try again. You can do this from the ground at first, too, standing by his shoulder and using the same pressure and release. When he’ll give his whole head softly clear around to your leg and let you hold it there for a moment, he’s ready for the next step.
STEP TWO – YIELDING TO THE LEG
Again, at the end of your ride, ask the horse to bend his head each way. Praise him, then bend his head and squeeze with your leg on same side he’s bent toward, with your leg back a little from where it normally is. You can use a voice command such as “get over” if you wish. He will step over with his hind legs, away from your leg. Be content with one step at first. As he grows in understanding, increase the number of steps until you can walk his hind legs all the way around in a circle with his front legs staying in place. There are usually no problems with this step if step one has been done correctly. If he’s sluggish and won’t move, bump or kick him while keeping his head bent. Spurs might be OK if you know how to use them, and a whip is good, used by your leg, if it doesn’t scare him and if you can use it and still bend his head around correctly. Do all this gently and slowly. He should be able to walk all the way around with his hind legs in three or four sessions easily.
STEP THREE – TURN ON THE FOREHAND
Same deal; at the end of your ride, and reward him afterwards. Bend his head just slightly, keeping just enough feel or tension on both reins to keep him from stepping forward, and use your leg to ask for a couple of steps of the hind legs around the forelegs. Pet him and go the other direction. Take a couple of days to be able to do a turn on the forehand all the way around in both directions. This step takes some finesse in balancing leg and rein pressure so that the horse doesn’t step forward or back. Review earlier steps if you have problems.
At this point it’s helpful while on the trail to practice leg yields. Take a light contact with both reins while at the walk or trot, bend the horse slightly, say, to the left and push him to the right with your left leg. He should move over diagonally. Ask for only a step or two at first, and before you know it, you can be doing pretty little forward and sideways traverses back and forth. Don’t overdo it, but it’s helpful to do some. This is especially helpful for the very forward or nervous horse that wants to move forward when he feels the leg pressure. This way he can move forward and sideways at the same time without getting too pressured.
STEP FOUR – SIDE PASSING
You can, at this stage, really teach the horse to side pass, or just do a little and move on to gates. They seem to get worried about side passing when they see no meaning or reason for it, so we usually just do a little, then go to gates and later come back to side passing when they thoroughly understand leg pressure.
Once the horse can do a complete turn on the forehand with his head only very slightly bent to the inside (to the right if his hind quarters are going left, and vice versa) he’s ready to start side passing. Stop him with his head about two feet from a wall or high fence. (Don’t put his head over a fence.) Using the same cues you used to do a turn on the forehand, plus cueing him to move his forehand over (slight contact on both reins, slight pressure of the left rein against his neck by the withers, right rein leading, left leg squeezing – reverse cues to go the other way.) Sit straight in the saddle or lean a little away from the intended direction of travel. He will take a couple of steps sideways. At first his front end or hind end will get ahead, then the other, but as you work at it, he will get smooth and even. “Feel, timing, and balance” (Ray Hunt) are very important. Go slow, and be satisfied with small improvements. We would only do this three or four times and go on to gates. He should get pretty good in a week. Review earlier steps now and then.
STEP FIVE – THE REAL THING: GATES
First, more preparation. Can you ride him through narrowish places without him jumping and removing your knees? Ride between horse trailers, two barrels, trees, whatever you have. If he’s afraid, start with wider spaces and gradually narrow them. Stop and back up now and then, and stop and pet him a lot. If it’s hard to get him to stand, ask for only five seconds at first, or two if need be. Be sure to never let him walk off without a cue. Don’t fight the horse, just set up situations where he’ll stand, and build on that. Often in the yard at the end of a ride he’ll stand best. Build on that by moving out from the “safe zone” gradually. He’ll probably stand better with another quiet horse. Use that, but build greater distances between them. Going away from home makes it easier to stop and stand than when headed towards home, so use that and build on it, too. Don’t fight with him, just keep his feet moving in circles, back, left, right, then breathe deep and take off all pressure when he stands for a moment. This process of teaching him to work gates will improve his ability to stand immensely, if you’re patient and keep making a little progress every day.
Once your horse can pass through narrow openings comfortably, and will stand reasonably well when asked, start stopping him next to a gate at home, using your leg cues to move him over pretty close to it. Sit there, pet him, then get off right there and put him away. Do this for a couple of days and he’ll be much more relaxed and happy about being asked to move to the gate.
Now all you have to do is open and close lots of gates. Move him up against the gate, with his head towards the latch and
stop. Keep remembering to stop. Pet him, then lean over (not too far, he should be right next to the gate) and shake the gate. Do this until it’s easy for him. If he moves off, try to check him before he’s really committed, but don’t pull on him. Just turn around and start again. When he stands for the gate to be rattled, get off and reward him. The next step is to unlatch the gate and move it back and forth. Next, open it towards you by moving him over and back. It’s important not to go through the gate when it’s too narrowly opened towards you. If the horse jumps he will squash your legs or his ribs in the gate. So open it nice and wide, ride through, and shut it. It’s OK to let go of the gate at this time. In fact, it’s better than leaning off the horse and letting him get out of control. Stay with the horse and keep in a good position at all times. The horse matters, not the gate. Obviously, this is to be done with a decent gate, not a heavy or broken-down one.
After a while, you can practice on all kinds of gates. Be sure to come to a gate on your left side one time, and right side the next Open some away from you and some towards you. Once you and the horse get good, back up through them occasionally. The horse will keep getting better, and the delicate control you have taught him will help with the rest of your work together.